Figlie al mare con i nonni. Giornata uggiosa. Voglia di mettere ordine dove non lo faccio... da anni.
E così ho deciso di riorganizzare il mio cassetto del comò.
Dopo aver fatto un progettino del divisorio che avrei voluto realizzare, ho comprato da Leroy Merlin un foglio di MDF spesso 4 mm per la folle cifra di 1€ (era un ritaglio circa 80 x 30 cm).
Ho disegnato a matita le sagome da ritagliare e poi ho proceduto al taglio con il cutter e il traforo.
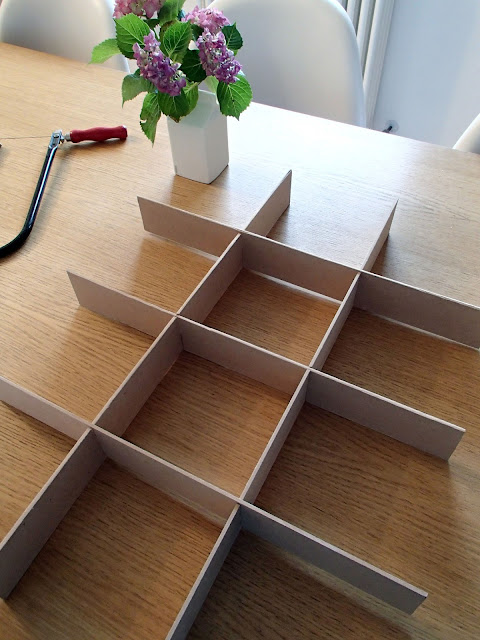
Ottenute le sagome ho passato la carta vetrata per regolarizzare e lisciare i bordi e infine ho incastrato i pezzi: cosa ne dite?
xxx
Daughters on holiday with grandparents. Gloomy day. Desire to bring order where I didn't... for years.
And so I decided to reorganize my dresser drawer.
After making a little project of the partition that I wanted to accomplish, I bought from Leroy Merlin a 4 mm thick sheet of MDF for the crazy amount of 1€ (it was a clipping about 80 x 30 cm).
I drew with pencil the shapes to be cut out and then I proceeded to cut with cutter and fretsaw.
After obtaining the shapes, I spent sandpaper to regulate and smooth the edges and then I stuck the pieces: what do you think?
 |
| OCCORRENTE: foglio di MDF, matita, righello, cutter, traforo e carta vetrata. MATERIAL: MDF sheet, pencil, ruler, cutter, fretsaw and sandpaper. |
 |
| Ecco le sagome ritagliate. Here you are the shapes cutted. |
 |
| Pausa caffè... Coffee break... |
 |
| La mia aiutante, Penny! Penny, my assistant! |
 |
| Carta vetrata per lisciare. Sandpaper to smooth. |
 |
| Tutti i pezzi sono pronti! All the pieces are ready! |
 |
| Basta incastrarli... You just need to stuck them... |
 |
| ...e metterlo nel cassetto! ...and put it in the drawer! |
 |
| Guardate com'è ordinato adesso! Prima era tutto alla rinfusa... Look how it is ordered now! Before it was a mess... |
 |
| Il progettino. My little project. |

